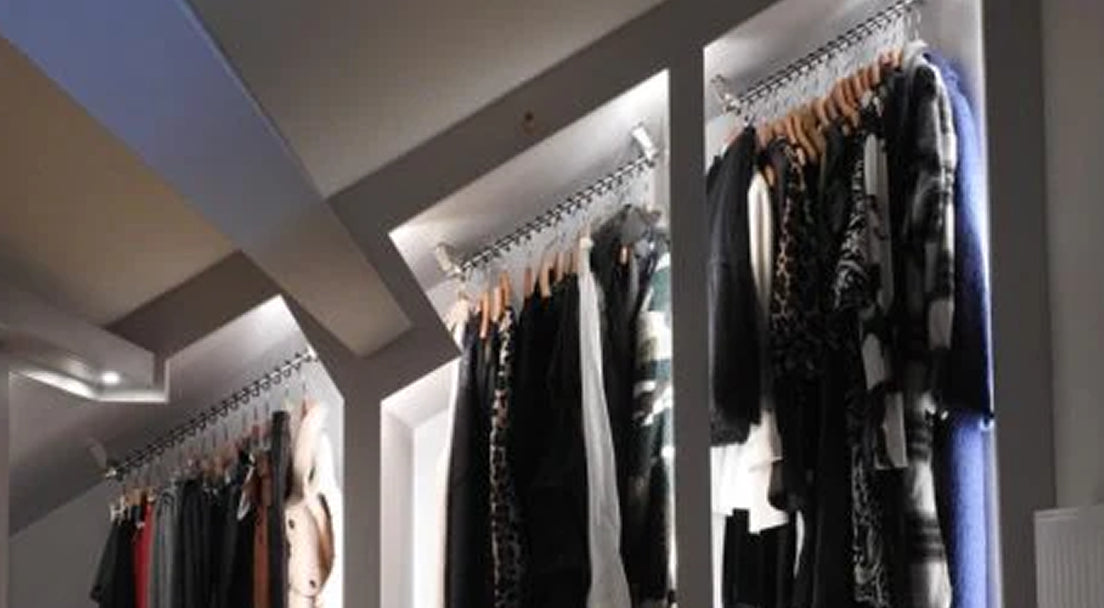
Four Ways to Fit a Zebedee Rail on a Sloped Ceiling.
The Easy Way to Turn Angles into Hanging Space.
In this guide, we’ll walk through clear measuring and fitting instructions for the Zebedee Hanging Rail and show four practical ways to fit your Zebedee rail:
- Direct to a wooden beam (fast and simple)
- Inside a wardrobe top or alcove (mind the top bracket protrusion)
- Using a 22 mm MR MDF batten when there’s no joist (trade‑smart method)
- Using a wider, decorative panel to bridge two joist support
By the end, you’ll know where to measure, how to set the angle, and how to get a clean, strong installation that works every day.
Understand the Brackets (One Small Rule, Big Impact)
Zebedee brackets are designed for simple, repeatable installs:
- Always fit brackets with the straight edge facing outwards.
- Brackets are designed to fit back‑to‑back so rail sizes can be combined for longer runs
This orientation keeps the rail seated properly and makes the finished look neat.

Tools & Materials (Simple Checklist)
- Drill + appropriate bits (pilot bit for wood; masonry bit for masonry)
- Pencil
- Screwdriver (manual or powered)
- Screws (wood screws supplied for timber/beam mounting)
-
Optional (no joist where you need one):
- 22 mm MR MDF batten (Moisture‑Resistant)
- Strong grab/construction adhesive (supportive, not a substitute for screws)
- Wall plugs / anchors when fixing into plasterboard with no joist support behind it. Appropriate screws + anchors for your actual substrate (heavy‑duty plasterboard anchors if no joist; masonry plugs for brick/block)
Safety First:
- Do not rely on adhesive alone for load‑bearing. Always use mechanical fixings rated for your substrate.
- If there’s no joist behind plasterboard, use heavy‑duty plasterboard anchors (check the load rating) and ideally fix a 22 mm MR MDF batten into structural points (joists/masonry), then mount the brackets onto that batten.
- Wear eye protection and check for hidden pipes/cables before drilling.
Before You Drill: Core Measuring and Fitting Instructions
Use these steps in every scenario:
- Choose position - Hold the rail roughly where you want it under the slope. Check how far clothes will hang down. Make sure doors and shelves won’t clash.
- Plan for the top bracket protrusion - The top bracket protrudes about 10 cm from the top toward the side wall. Leave space for your screwdriver to reach the screws.
- Mark in the right order - Always fit the bottom bracket first—it’s your anchor. Then use the rail itself to guide where the top bracket should go.
- Bracket orientation - Fit back‑to‑back, straight edge facing outwards. This is critical for a tidy, secure install.
- Pilot holes help - In wood or MDF battens, pilot holes make clean, strong fixes.
Method 1: Direct to a Wooden Beam (Fast & Simple)
If you have a solid timber beam or exposed joist, this is the easiest.
Step-by-step:
- Mark the bottom bracket at your chosen height.
- Fit the bottom bracket first, straight edge outward. Use pilot holes if needed; screw firmly into wood.
- Offer up the rail and use it to position the top bracket (back‑to‑back, straight edge outward).
- Loosely fix the top bracket.
- Seat the rail into both brackets and final‑tighten.
Method 2: Inside a Wardrobe Top or Alcove (Mind the 7 cm)
In tighter spaces, plan access before you drill.
Key points:
- The top bracket protrudes ~10 cm toward the side wall.
- You’ll need screwdriver access to tighten it.
Step-by-step:
- Measure internal width/height, hold the rail where hangers won’t hit doors, or back wall.
- Check driver access for the top bracket (bring a stubby or right‑angle driver if needed).
- Fit the bottom bracket first, straight edge outward; screw firmly.
- Offer up the rail and loosely fit the top bracket.
- Seat the rail, final‑tighten.
- Open/close doors to confirm clearances.

Method 3: No Joist Where You Need One? Use a 22 mm MR MDF Or Wooden Batten
Unsure what’s behind the board: Use a stud/joist finder.
If you can’t hit structure where you need it, install the MR MDF batten and anchor it properly and create a secure fixing line first.
What the batten does:
- Spreads load, gives you a predictable fixing point, and lets you place the rail exactly where it works best.
Step-by-step:
- Plan the batten line and length so the top bracket lands in the right spot.
-
Fix the batten for your substrate:
- Through plasterboard with no joist behind: use heavy‑duty plasterboard anchors rated for the load or fix into nearby structural points (joists/masonry).
- Into masonry: use masonry plugs and proper screws.
- Add grab adhesive along the batten for continuous contact (supportive, not a substitute for screws).
- Let adhesive cure as directed before loading.
-
Mount the Zebedee brackets onto the batten:
- Bottom bracket first, straight edge outward.
- Offer up the rail, position the top bracket straight edge outward.
- Loosely fix, seat the rail, then final‑tighten.
-
Add a second rail if needed, fit the next bracket straight edge back‑to‑back and repeat
Remember: Adhesive helps, but mechanical fixings do the heavy lifting.

Method 4: Decorative Wide Wood Panel Bridging Two Joists (Strong & Stylish)
This method takes Method 3 one step further.
Instead of using a narrow batten, you install a wider decorative wood panel (e.g. 600 mm wide) that:
- Bridges between two joists
- Is securely fixed at the joist points
- Creates a beautiful, built‑in wardrobe‑style finish
- Gives you a smooth surface to mount the Zebedee rail
- Looks like part of the room’s design
This is perfect when you want a premium finish or need the rail to align visually with cabinetry.
Steps:
- Locate two joists on the sloped ceiling.
- Cut your decorative wood panel to size.
- Fix the panel directly into the joists using wood screws or structural fixings.
- You may add a thin bead of grab adhesive for full‑surface contact.
- Once the panel is secure, treat it like a solid timber beam:
- Mark the bottom bracket
- Install with straight edge outward
- Offer up the rail and position the top bracket back‑to‑back
- Loosely fix, seat the rail, then tighten
- Add paint or finish to match your wardrobe or room.
Why people love this method:
It gives the appearance of a custom-built wardrobe top that blends perfectly into an attic or loft conversion, while still delivering maximum structural integrity.
Step‑By‑Step Recap (All Scenarios)
- Plan position and check hanger drop.
- Fit bottom bracket first.
- Use the rail to guide the top bracket.
- Install brackets back‑to‑back, straight edge outward.
- Allow for the ~7 cm top bracket protrusion and driver access.
- Dry fit, seat the rail, then final‑tighten.
- Hook hangers into the spring turns and enjoy!
If you have any questions: remember our team is just a phone call away and always happy to help.